

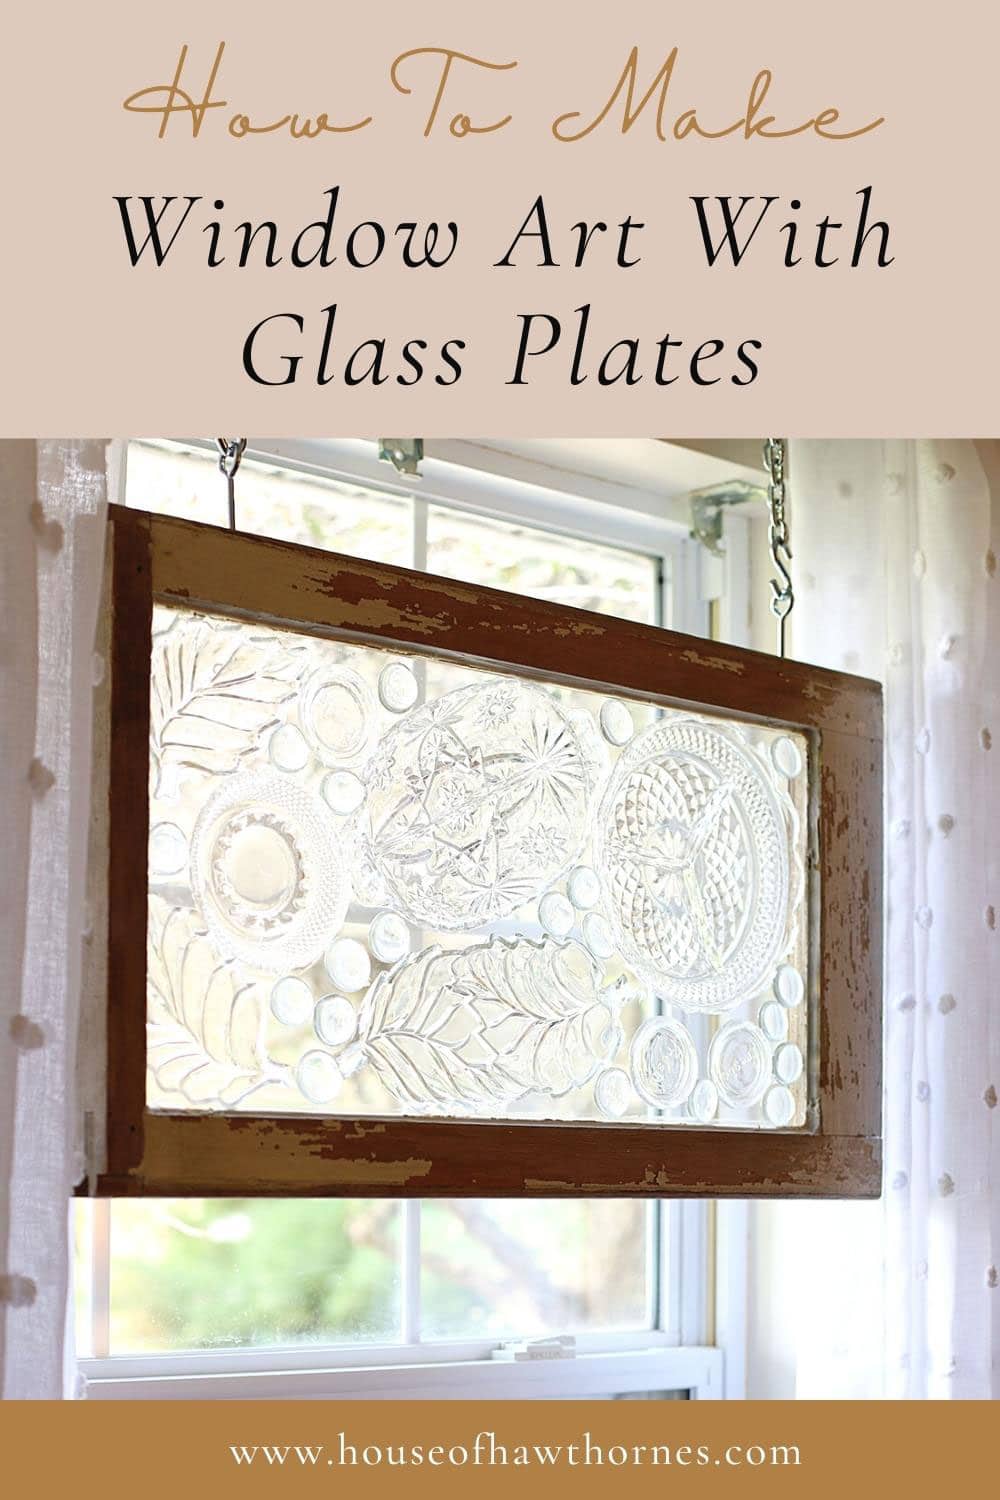
I have been wanting to make a faux stained glass window using pressed glass plates from the thrift store forever! And I finally got around to doing it this weekend.
This is an inexpensive way to give a mosaic look to a windowpane.
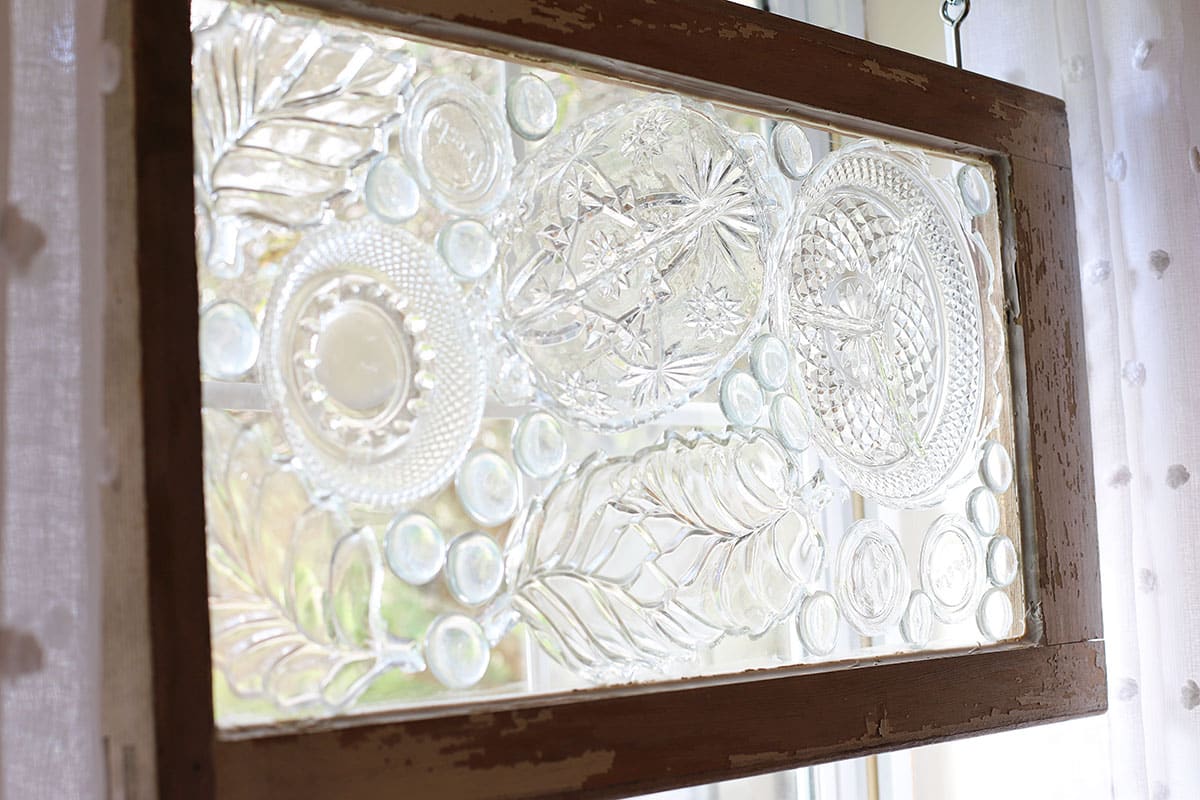
These windows look great hung in front of your actual windows, so no need to "ruin" your actual windows that protect your home from the elements.
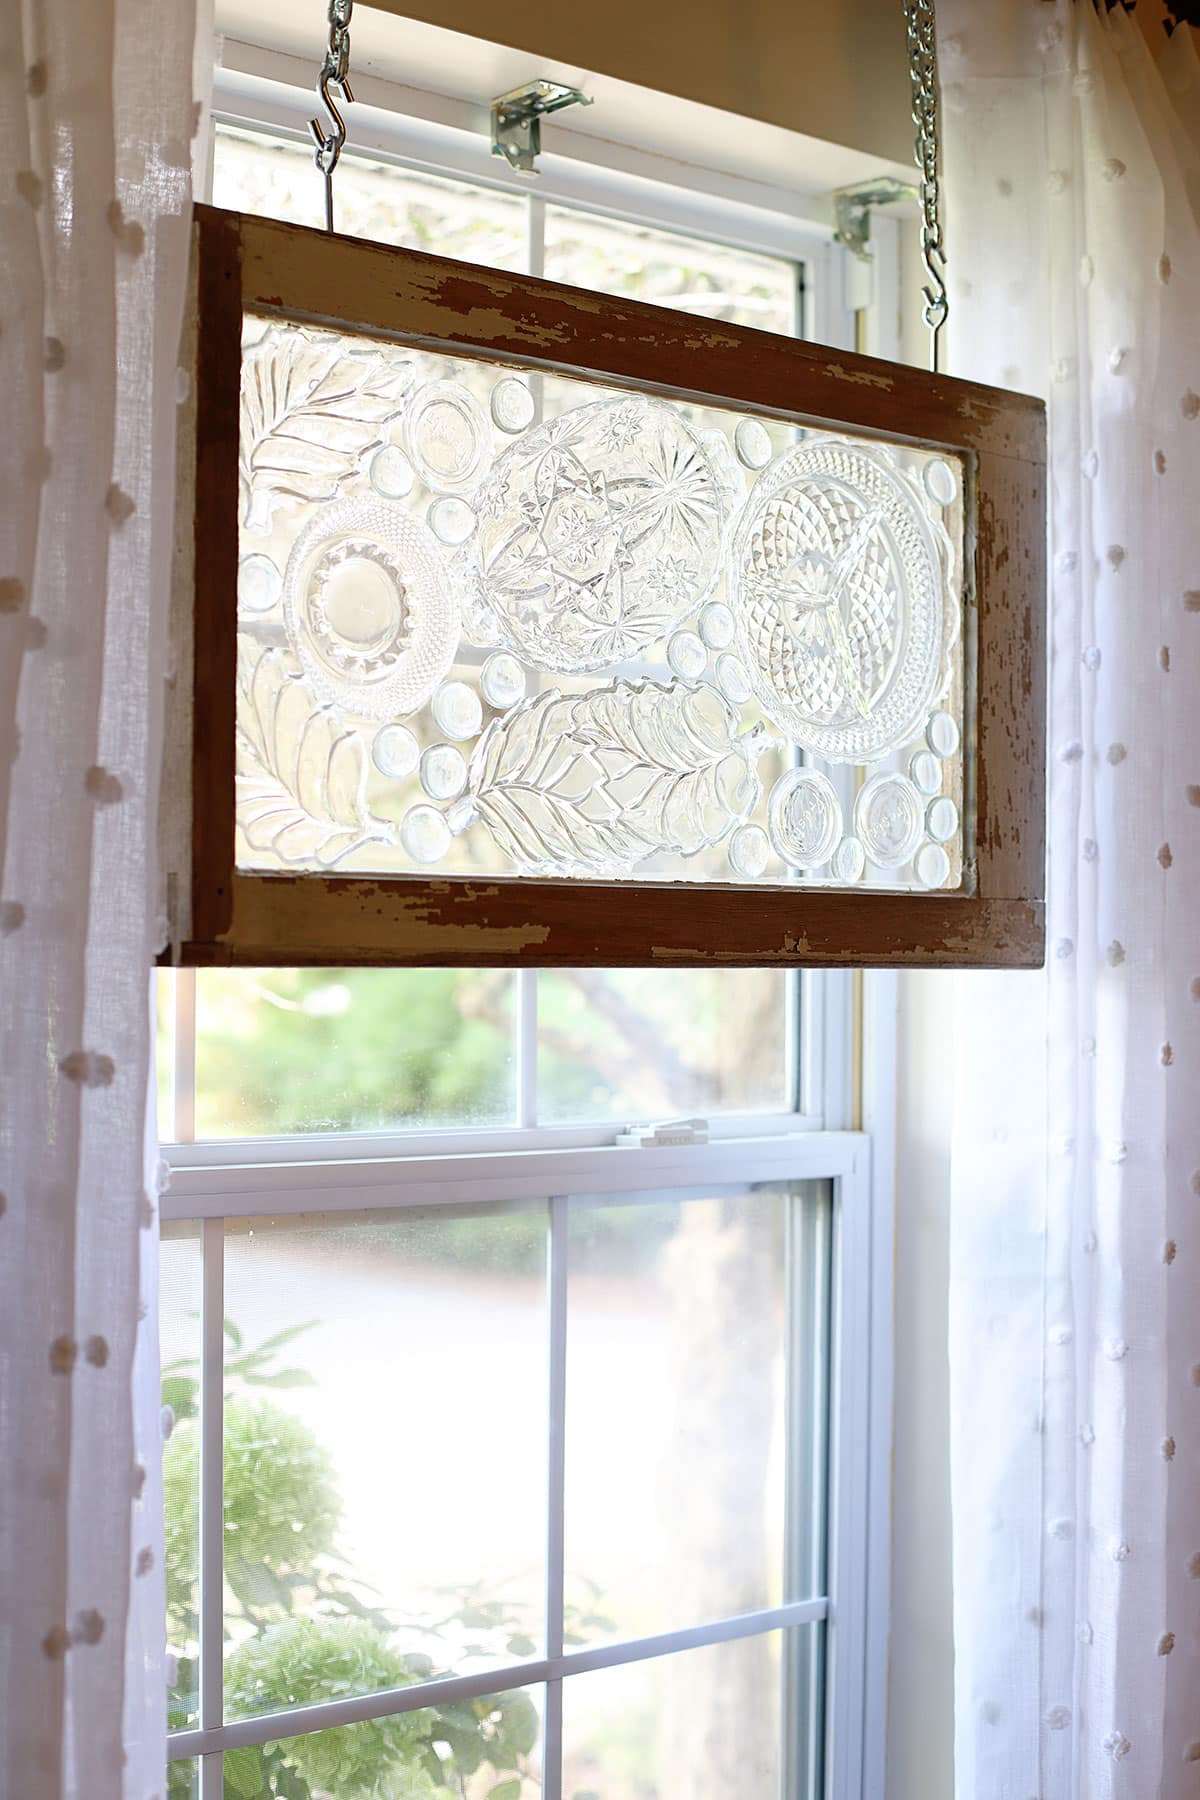
When the sun hits the window just right, the light dancing off the designs in the pressed glass is magical.
Table Of Contents
✨ BTW, today is Thrift Store Decor Wednesday, so make sure you hang around to the end of the post to see the rest of the team's thrift store repurposes for the month!
I started off by finding a perfectly sized window at the local Habitat ReStore store.
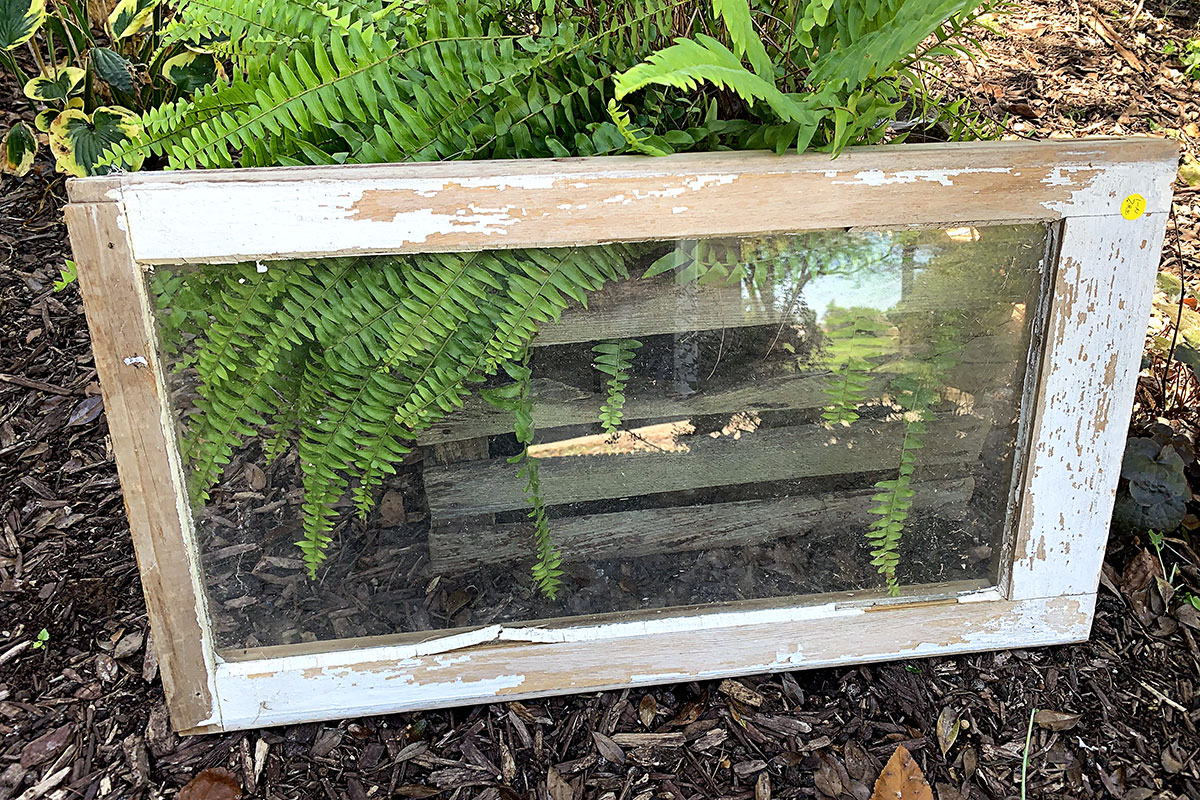
It was only $6 probably because it had chippy paint on it, but I didn't let them know I actually wanted the chippy paint.
I would have paid extra for that!
And then I found a whole bunch of very inexpensive pressed glass plates and bowls at the thrift store.
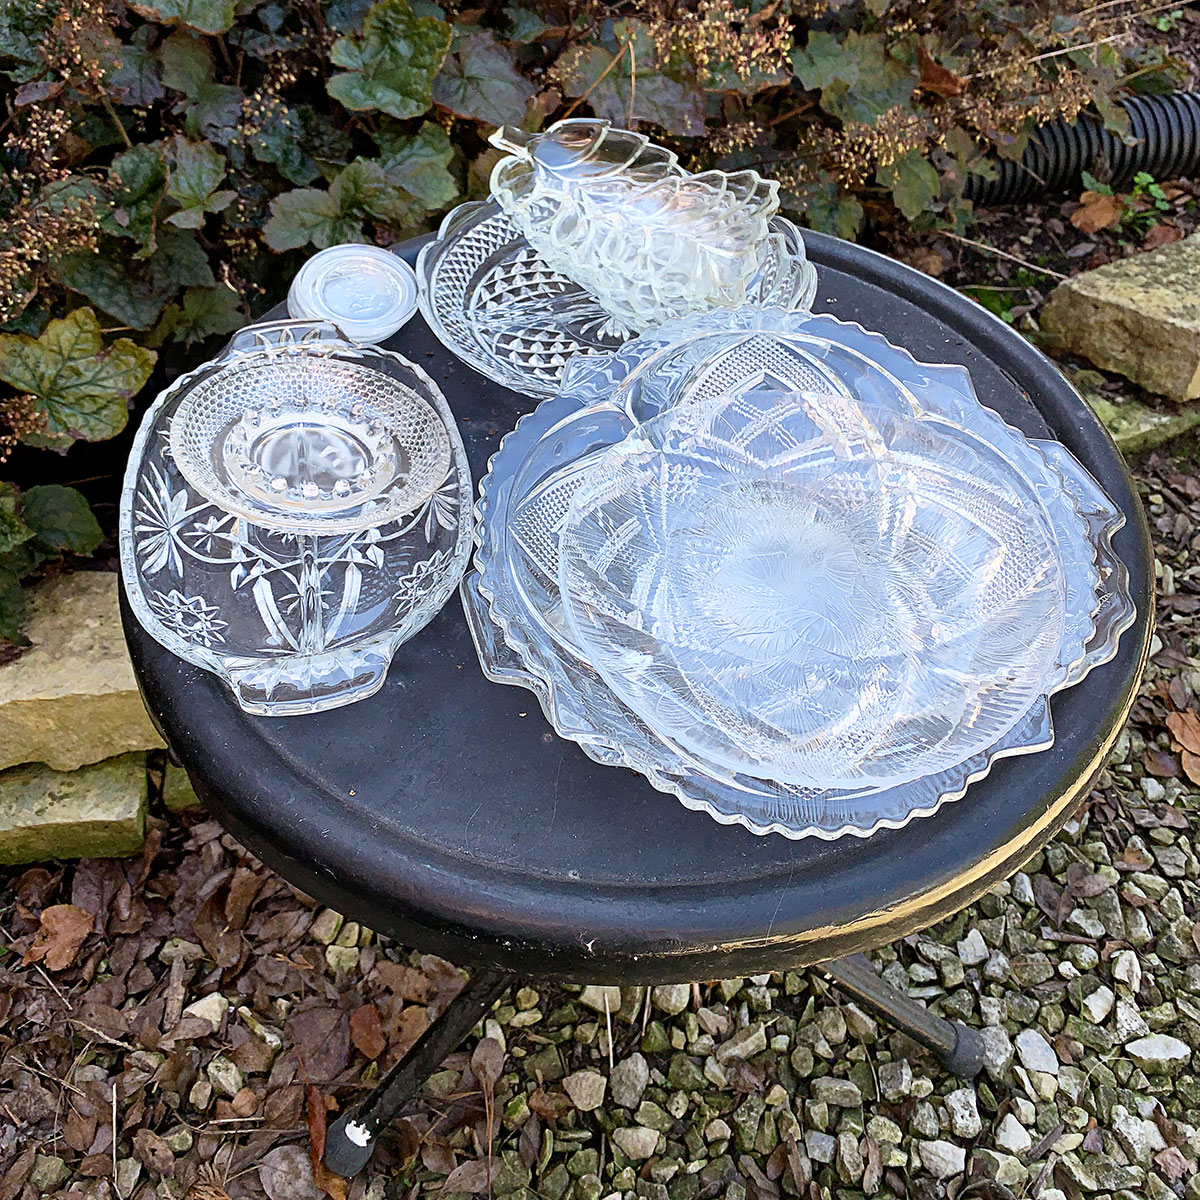
My thrift store sells just about any piece of glassware for $.69, so I just grabbed a bunch.
What I don't use for this project I'll probably just donate back to the thrift store.
Gotta keep that crafting hoard down!
What Kinds Of Glass Plates Work Best
While at the thrift stores you want to look for dinner plates, bowls, sugar bowls, and vegetable plates that are pressed glass ( in the next section I talk about what pressed glass is). You should have MANY to choose from at any thrift store.
First and foremost, choose items that have no cracks or large chips. A crack will make the artwork less sturdy over time.
Look for items on the smaller size. You'll notice on my window I used 3 medium-sized serving dishes, and the remainder of the items are much smaller.
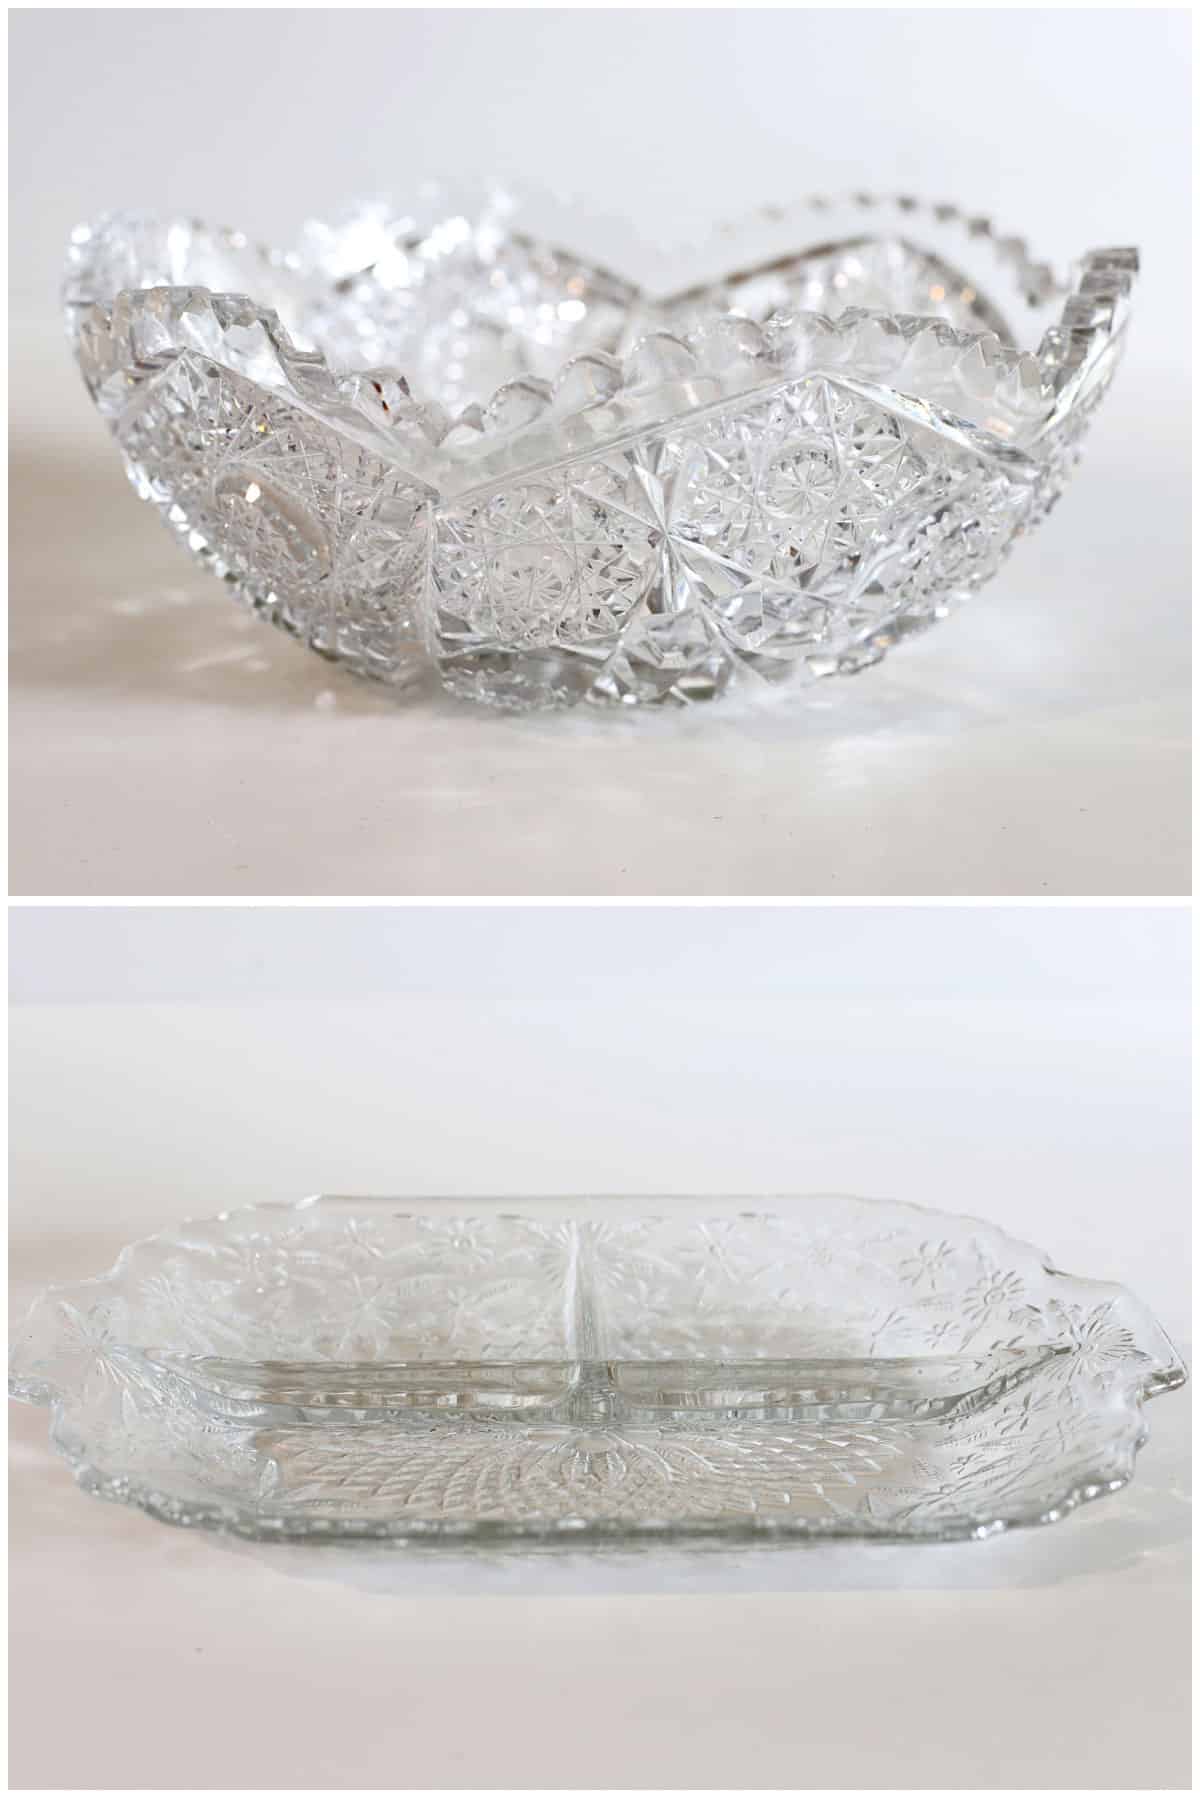
You want items that have a flat rim so there is more surface area for the glue to adhere to the window.
In my photo below, the bowl on the top is too wavy and also has lots of teeth on the rim. If I had used it there would only be about an inch on each of those waves that would have made contact with the window. It's also very deep and would stick out pretty far on the backside of the window.
The bowl on the bottom is a much better choice because it has a smooth rim so the entire rim will make contact with the window and it is much more shallow. It's perfect for this type of project.
The Difference Between Cut Glass and Pressed Glass
The best type of glass to use in this project is pressed glass. It's lighter than cut glass and plentiful at thrifts and flea markets.
But what is the difference between pressed and cut glass?
Pressed glass is made by pressing hot molten glass down into a mold. It's made to have the look of cut glass without the price.
Cut glass is made by taking a smooth bowl and having artists hand-cut the geometric shapes and indents into the bowl using special cutting tools and wheels.
When you pick up a piece of cut glass and run your hand over the pattern on the outside of the piece you will notice it has a sharp feel to it almost as if you might cut yourself on the pattern. Pressed glass pieces still have the pattern on the outside of the piece but it will feel much smoother when you run your hand across the bowl.
Most pressed glass pieces have mold marks and lines in them from where the glass was pressed down into the mold. Cut glass items do not have mold marks due to no molds being used to make them.
Cut glass has lead in it which is what makes it extremely clear and sparkly. That lead causes the cut glass pieces to be significantly heavier than pressed glass pieces.
Tutorial - Upcycled Window Art Using Glass Plates
(This post contains some affiliate links for your convenience. You can read my full disclosure policy here.)
Supplies
- Old Wooden Window
- Various Pressed Glass Plates from the thrift store
- Glass gems (Dollar Tree, Michael's or JoAnn's)
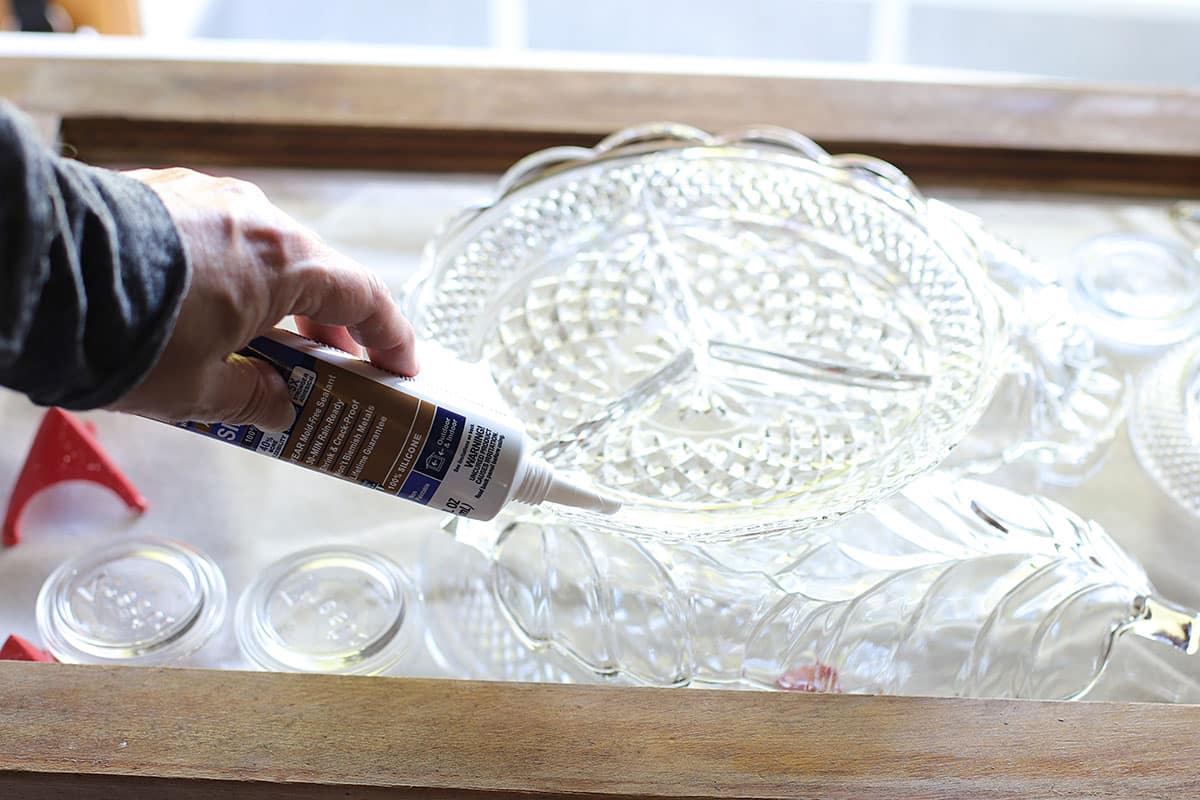
- GE Advanced Silicone Window And Door Sealant* - CLEAR
- Windex
- Rubbing Alcohol
- 2 Eye Screws - ¼" x 3 ¾"
- Chain, Wire or Rope (to hang it)
- 2 S Hooks 2-3" long (if using a chain for hanging)
*I used about ⅔ of a 2.8 oz squeeze tube for my plates. If you have a much larger window you may want to pick up 2 of the 2.8 oz tubes or one of the 10 oz containers made for caulking-guns.
Supplies Needed If Also Re-Glazing Window
- Window Glazing - I used Dap Latex Glazing in White
- Caulking Gun
This is where you think I am going to show you how to glaze a window. You would be wrong.
Glazing a window just means replacing the caulking that goes around the pane and holds the glass in place within the wooden frame of the window. My window had big chunks of glazing missing and when I went to remove some other loose bits it all just basically disintegrated in my hands.
So for my window, glazing was a must. Chances are for your window it will be OK to just skip this part.
I can glaze a window, but it's not pretty. For my window, it did not matter since I was doing it only for durability and it was on a window that already looked rustic.
But if you want to learn how to glaze a window for real, I found a great Youtube video by The Homestead Craftsman on How To Glaze A Window Sash.
And again, this probably won't apply to you (so not sure why I typed that all out)!
Instructions
Time needed: 1 hour
How To Make A Faux Mosaic Window
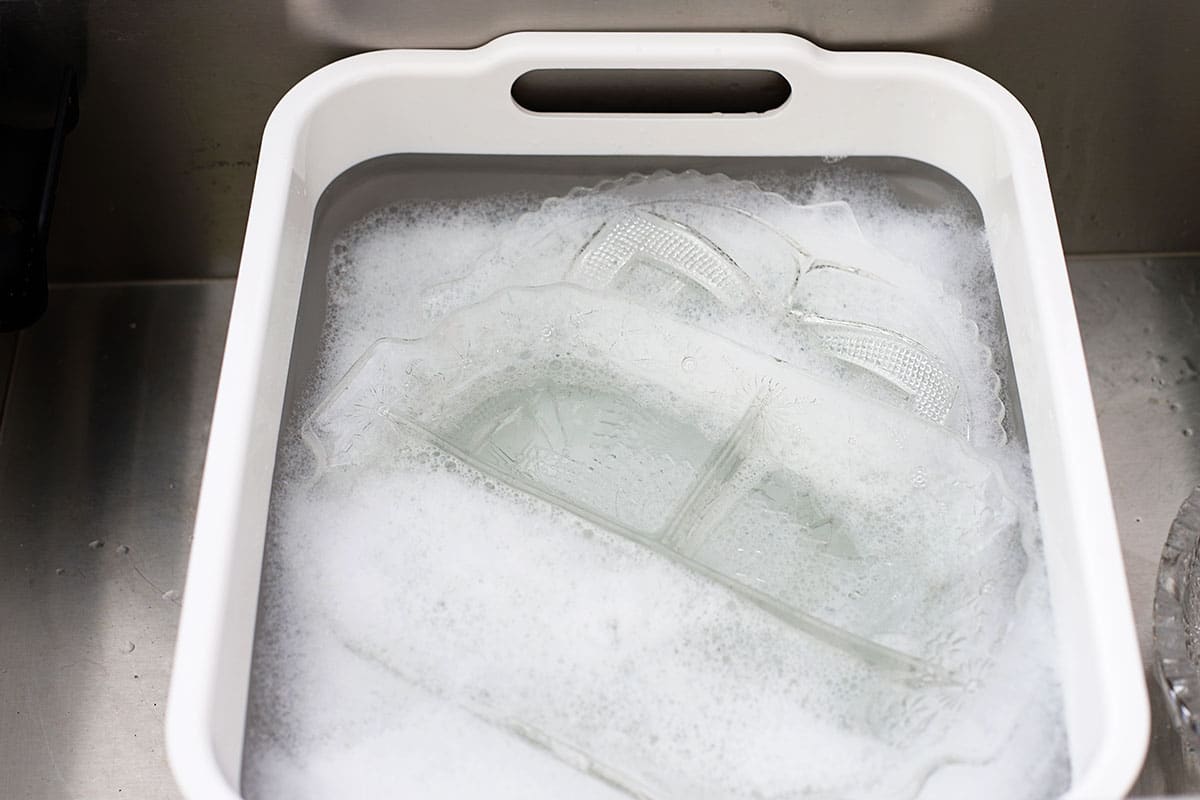
- Thoroughly Clean Your Glass Pieces
Soak your glassware in hot soapy water to remove any thrift store grime and price tags (you know how thrift stores are with their price tags and evil packing tape).
Dry with a soft dry lint-free cloth (a linen towel or old t-shirt works fine).
- Thoroughly Clean Your Window
Use glass cleaner to clean off the window pane on both sides.
Follow this up by wiping down the side you will be gluing plates to with rubbing alcohol. You want it to have a squeaky clean surface to adhere to. - If Necessary Reglaze Your Window Panes
If needing to reglaze the panes this is a good time to do it.
See my notes above about why I reglazed mine and why I am not showing you how I did it (there is a link to an excellent video on it though).
Again, very easy to do, don't let my sloppiness with a caulking-gun deter you. - Stage Your Glassware
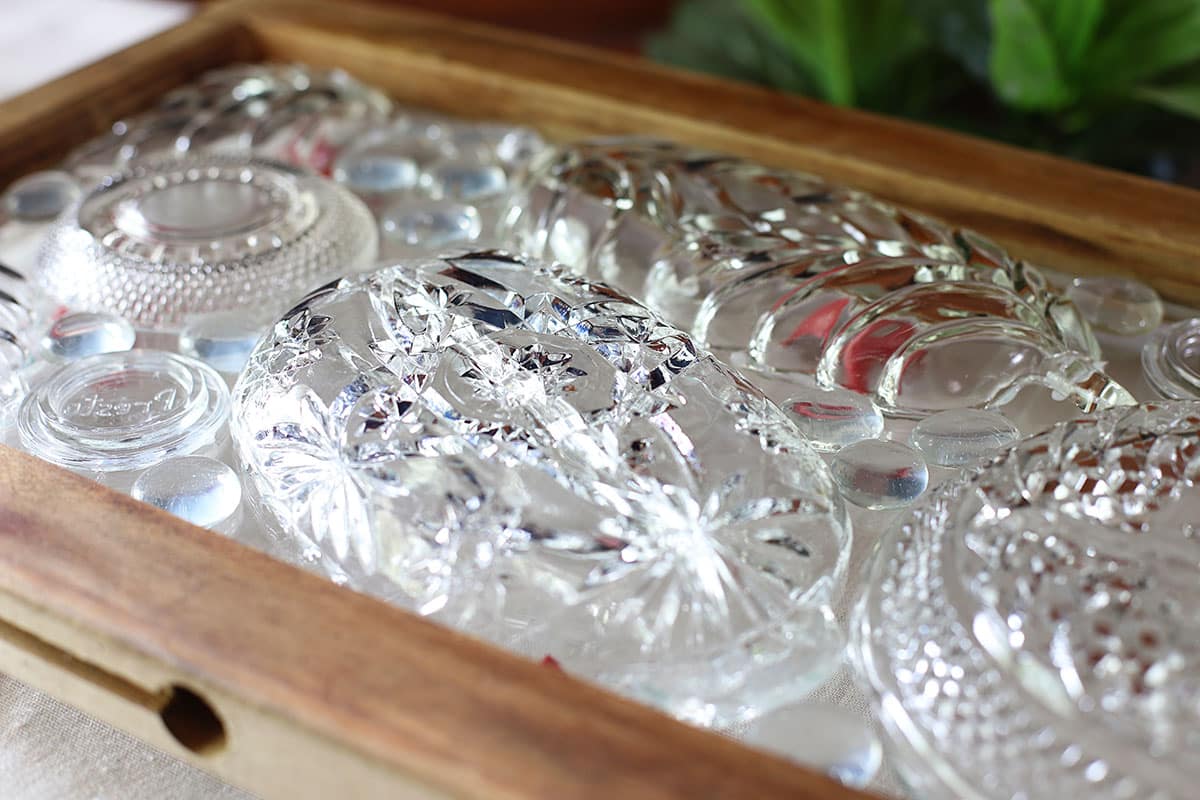
Decide which side of the window you want showing and then flip the window over so you are working on the backside.
Lay your glass pieces down on the window pane and arrange them. It may take a bit of playing with them to get them to fit if your window is narrow, but keep working on it until you have a design you are happy with.
Use your glass gems to fill in any empty areas. - Apply Glue
It is very important you don't just start willy-nilly gluing glassware down without pre-fitting it. Trust me, save yourself a headache and pre-fit your pieces.
While ALL THE GLASSWARE is still setting on the back, remove each piece one at a time, apply glue to the rim and press it down onto the window. Then go on to the next piece.
If you make a mistake and have to move a plate a little bit, you can get rid of excess glue on the window with Goo Gone.
- Allow Glue To Set Up
Allow your adhesive to dry for at least 24 hours before you even think of hanging the window.
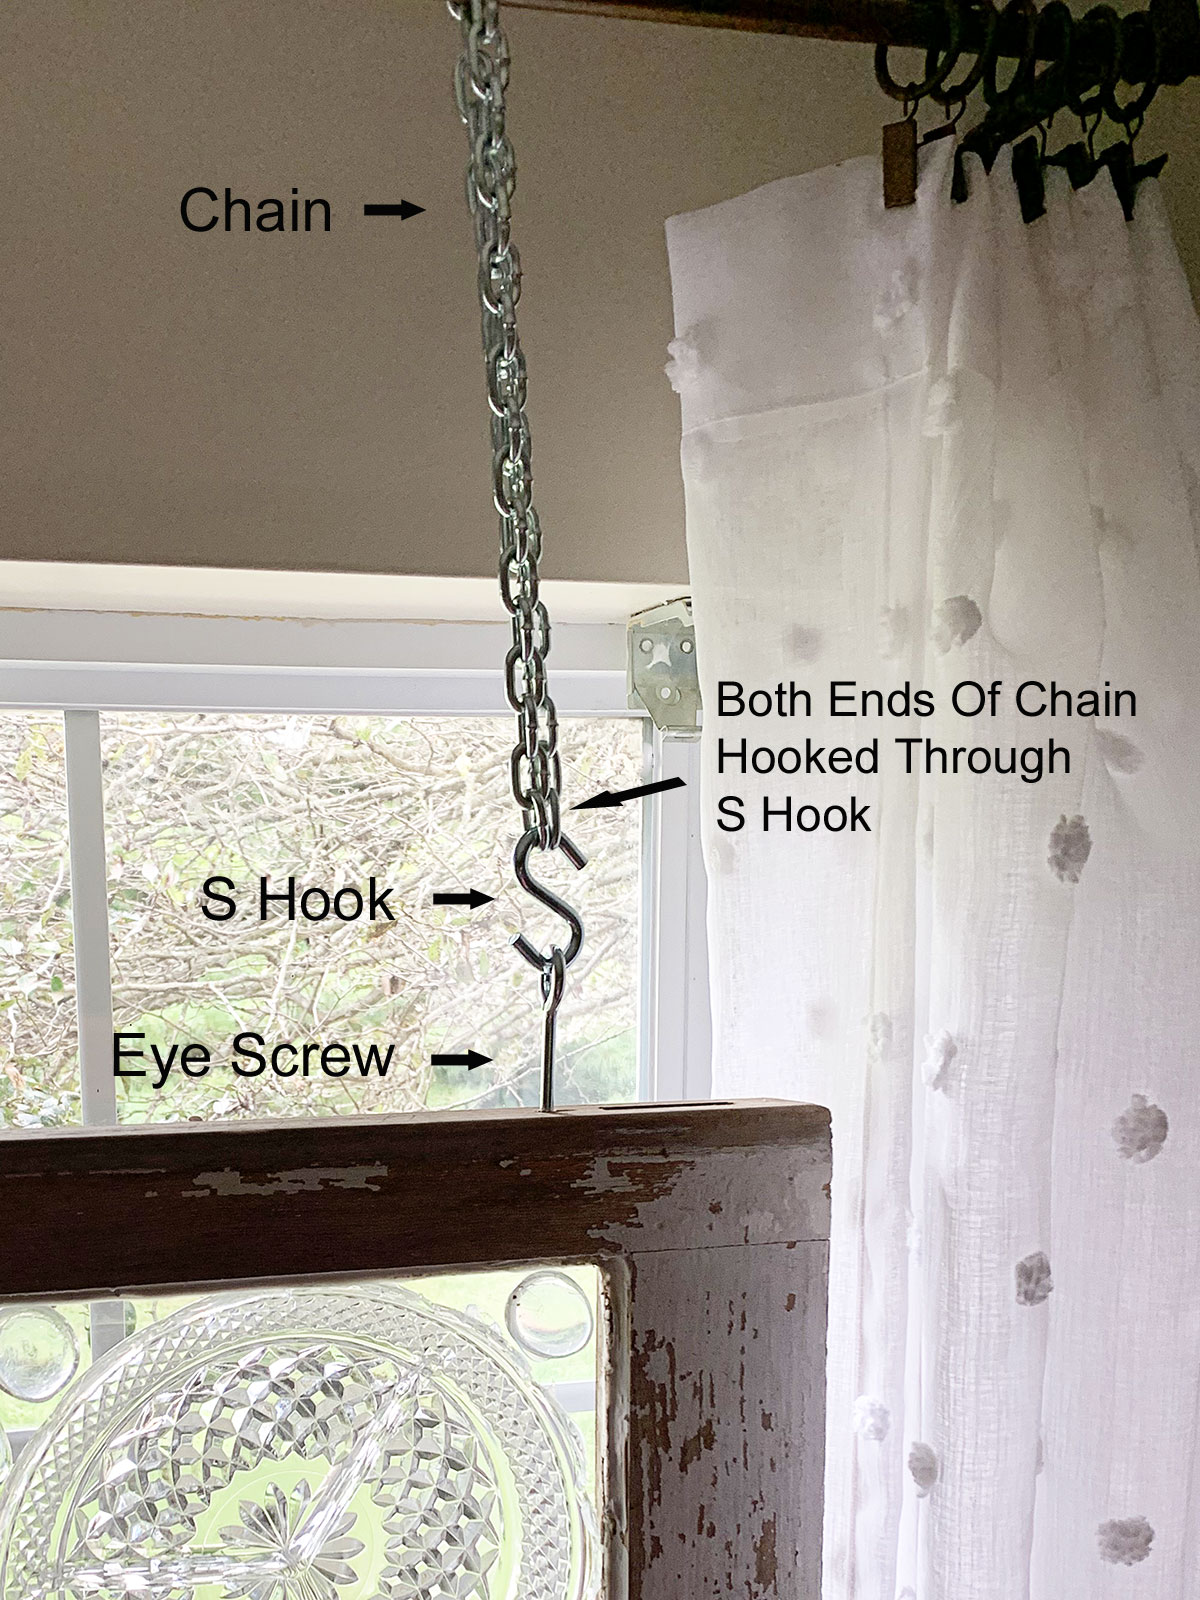
- Attach Eye Screws and S Hooks
Decide which direction you want your window to hang (I chose horizontally since it fit best where I wanted it hung.
Screw in the eye screws on either end of the top staying at least 2" away from the outermost edges.
Attach the S hooks to the eye screws.
- Hang Window
In my case, I had a curtain rod over the window already so I just ran the chain over the top of the rod and down the other side. Then I just hooked both ends of the chain onto the S hook.
If you don't have a sturdy curtain rod you want to hang it from, you can screw additional eye screws into the area above the window for hanging.
Click HERE for a printable version of the tutorial.
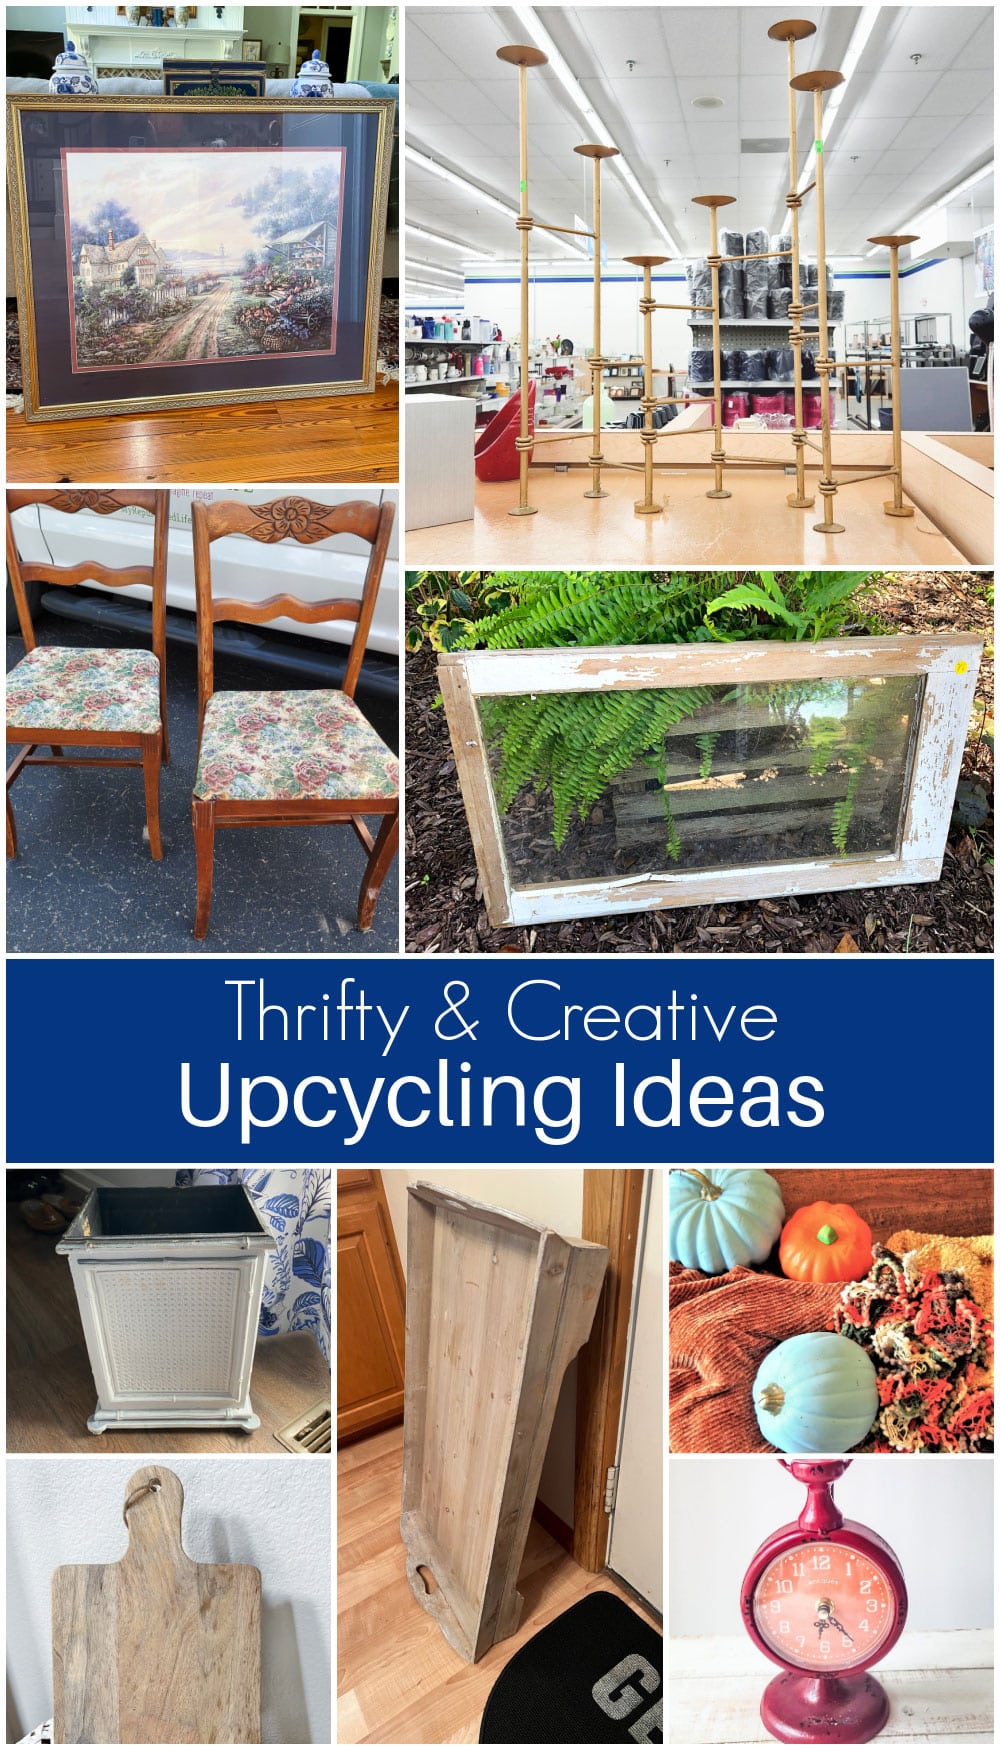
Thrift Store Decor Team Projects
Now let's go see what the other Thrift Store Decor Team members are up to today!
Rose Back Chair Makeover My Repurposed Life
Transfer A Recipe To A Cutting Board My Uncommon Slice of Suburbia
Modern Fall Decor for the Fireplace Sadie Seasongoods
Desktop Hanging Clock Makeover Domestically Speaking
Framed Wedding Seating Chart Our Southern Home
Large Thrifted Wooden Tray Makeover Organized Clutter
DIY Recycled Sweater Pumpkins Petticoat Junktion
Vintage Trash Can Upcycle Shop At Blu
Window Art With Glass Plates - House Of Hawthornes (that's me)
Jean-Ann Suchy
Hello, I am wanting to make mine for a garden decoration. Do I need to do anything different since it will be outdoors?
Pam Kessler
Just make sure you use the adhesive I mentioned (the GE Advanced Silicone) since it's for windows and doors and made for outdoor use. It's weatherproof and doesn't shrink or crack with temperature changes.
Rickey Baker
I just finished my first one and within 2 weeks using Gorilla glue every place that I glued something the window cracked. I’m bummed.
Janet McIlwain
Your tutorial inspired me to use inherited pressed glass from my grandma! Might I suggest preparing the window frame for hanging before attaching heavy glass to window.
Patty
Why is the glue showing thru on the glass gems after I glue them down with E-2000 or Loctite glue? What is the correct amount of glue & placement on the gem.
I press down hard on the gem so how come the glue is not spreading out on the back of the gem?
Thank you